
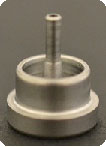
Mitegen loop环底座型号 Base Styles Available
B1 (SSRL)
B1A (ALS)
B3 (SSRL)
B3S (ALS)
B5 (SPINE)
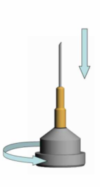
快速将环组装到盖子中以进行晶体收获,无需使用胶水或等待环氧树脂干燥。
Quickly assemble loops into caps for crystal harvesting, without using glue or waiting for epoxy to dry.
-
Save Time and Costs
Eliminate time spent glueing loops into bases.
-
Get Robot Compatible Styles
Designs available for every all automated beamline sample placement robots
-
Cryogenic and Room Temperature Use
The bases grip the loops securely at both cryogenic and room temperture
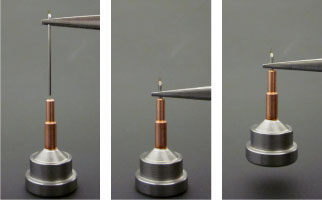
You no longer need to spend time gluing crystal mount/loop pins into your goniometer bases (“caps”) before harvesting your crystals. Gluing and removing glue can be time consuming and messy. Once glued, the loop and base must be used as a single unit. If the loop fails or becomes bent, both loop and base become unusable. If the glue fails during automated handling, the loop and pin can fall out and jam the automounter.
-
节省时间和成本
消除将环粘到底座上所花费的时间。
-
获取机器人兼容样式
适用于所有自动化光束线样品放置机器人的设计
-
低温和室温使用
底座在低温和室温下都能牢固地抓住环
在收获晶体之前,您不再需要花时间将晶体安装/环销粘到测角仪底座(“盖子”)上。粘合和去除胶水可能既耗时又混乱。粘合后,环和底座必须作为一个整体使用。如果环路失效或弯曲,则环路和基座都将无法使用。如果在自动处理过程中胶水失效,环和销可能会脱落并卡住自动安装机。
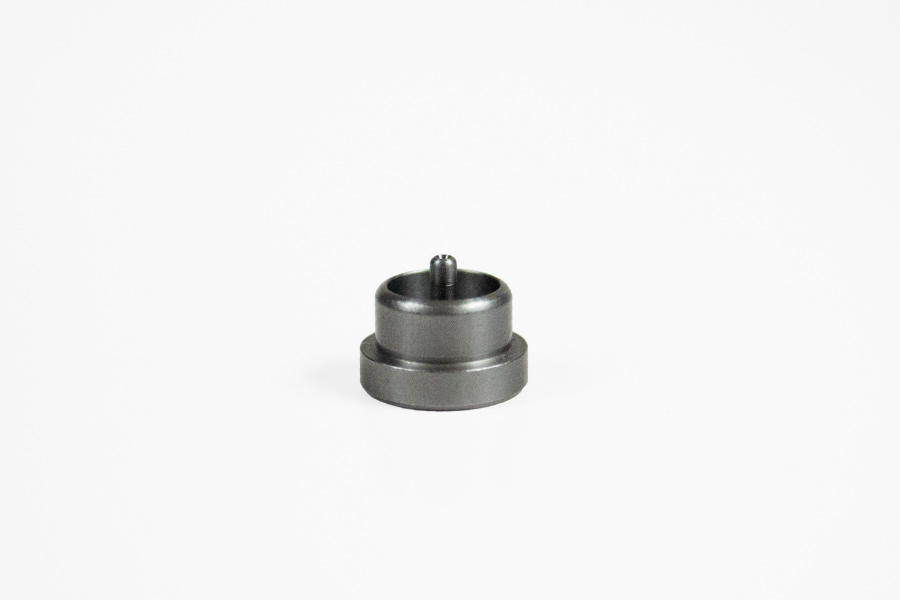
REUSABLE BASE INSTRUCTIONS FOR USE AND CARE
可重复使用底座的使用和保养说明
For optimum performance and maximum usable life of your reusable bases, we recommend the following procedures:
- Make sure the bases are at room temperature before attempting to insert or remove sample mounts. Attempting to insert or remove sample mounts immediately after removal from cryogenic storage can damage the gripping equipment.
- Make sure that all parts are clean and dry, and do not use lubricants. Moisture, oils or lubricants will decrease the gripping strength.
- Grip the crystal mount’s stainless steel rod firmly using heavy-duty serrated-end tweezers, such as those sold by Mitegen. These minimize rod slip and twisting during insertion and removal.
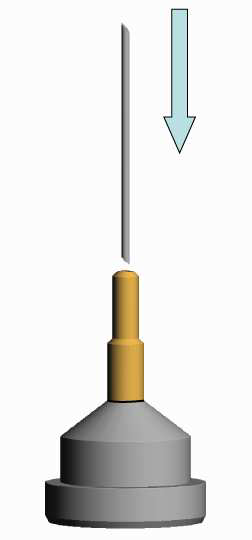
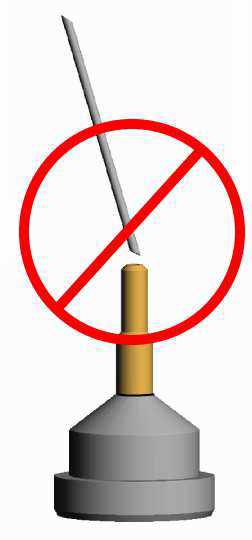
- Insert the stainless steel rod straight down into the center of the post. Avoid tilting the rod to the side or inserting at an angle.
- As you insert the rod, rotate the base slowly to help guide the rod into the base and to ensure a strong, uniform hold.
- The rod should insert smoothly without excessive force. If insertion is difficult or the grip is not secure, remove the pin and repeat steps 1-3. Do not force the steel rod into the base.
- Although these bases are reusable, the will eventually wear out, and may be damaged by improper use. If you cannot obtain a secure grip, either dispose of the base or use epoxy or glue (as with a conventional base.) Do not send loosely held samples to the synchrotron.
为了获得可重复使用底座的最佳性能和最大使用寿命,我们建议执行以下程序:
- 在尝试插入或移除样品支架之前,请确保底座处于室温。从低温储存中取出后立即尝试插入或取出样品架可能会损坏夹持设备。
- 确保所有部件清洁、干燥,并且 不要使用润滑剂。水分、油或润滑剂会降低握持强度。
- 使用重型锯齿状端镊子(例如 Mitegen 出售的镊子)牢牢握住晶体安装座的不锈钢杆 。这些可以最大限度地减少插入和移除过程中杆的滑动和扭曲。
- 将不锈钢杆笔直向下插入立柱的中心。 避免将杆倾斜到一侧或以一定角度插入。
- 插入杆时,缓慢旋转底座, 以帮助将杆引导到底座中并确保牢固、均匀的固定。
- 杆应顺利插入,不得用力过猛。 如果插入困难或抓握不牢固,请拆下销钉并重复步骤 1-3。请勿将钢棒强行插入底座。
- 尽管这些底座可以重复使用,但最终会磨损,并且可能因使用不当而损坏。 如果无法牢固抓握,请丢弃底座或使用环氧树脂或胶水(与传统底座一样)。 请勿将松散固定的样品发送到同步加速器。
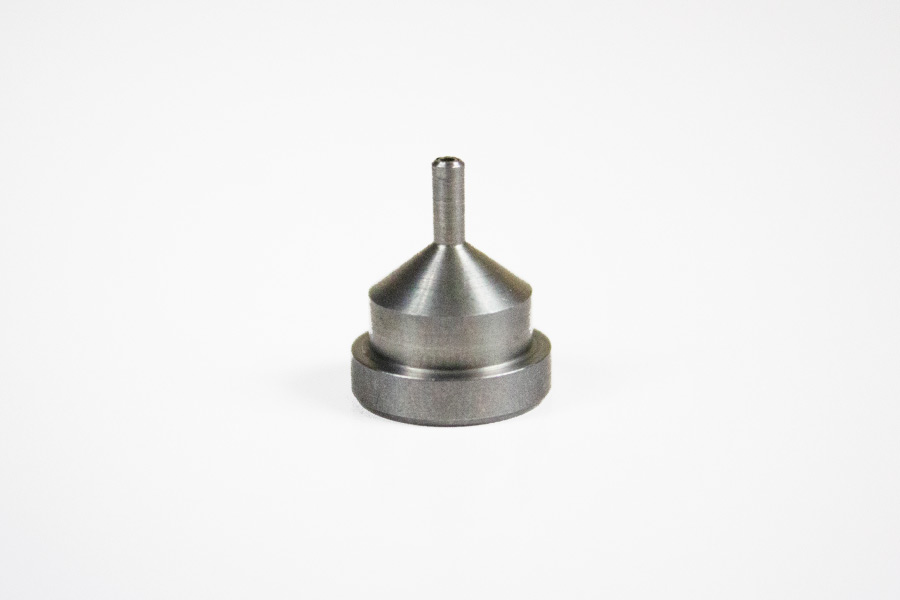
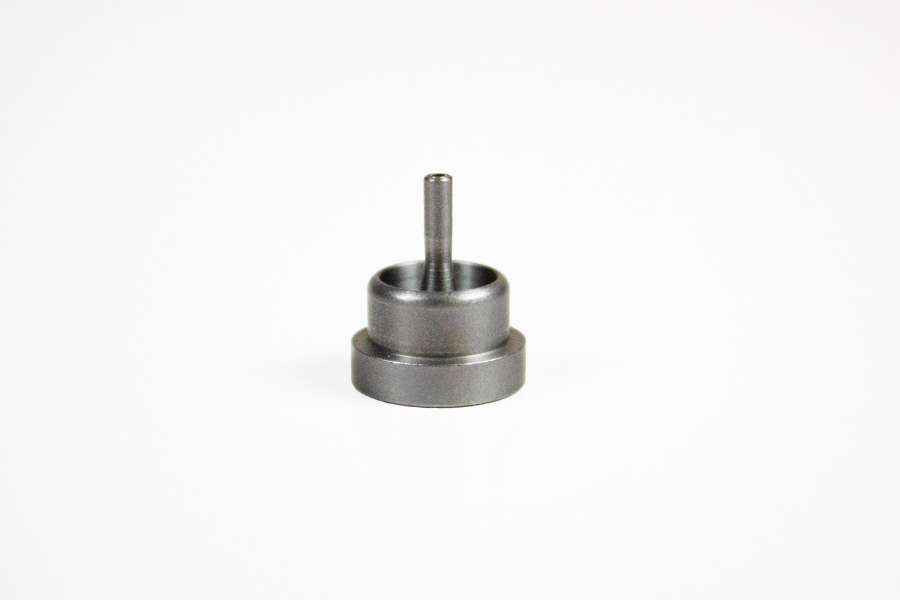
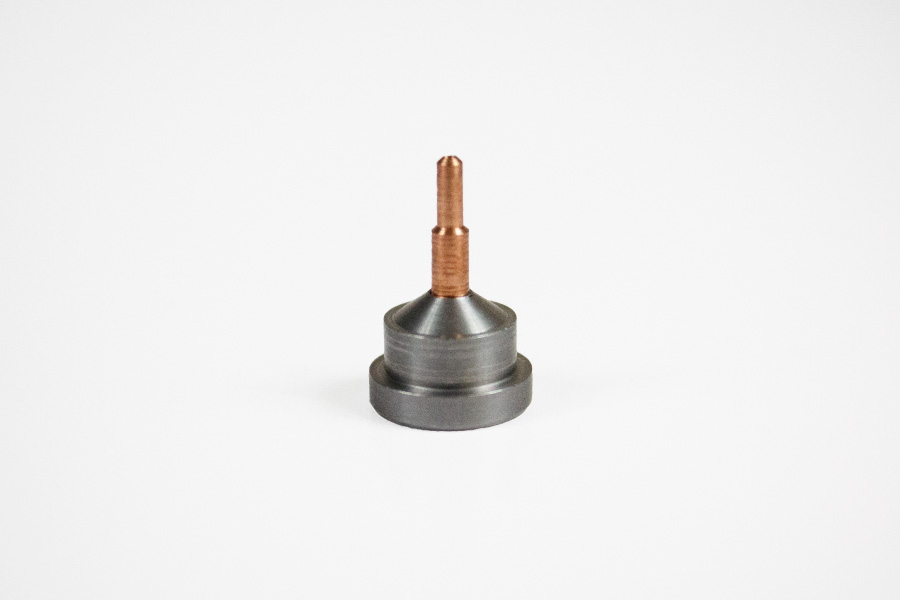
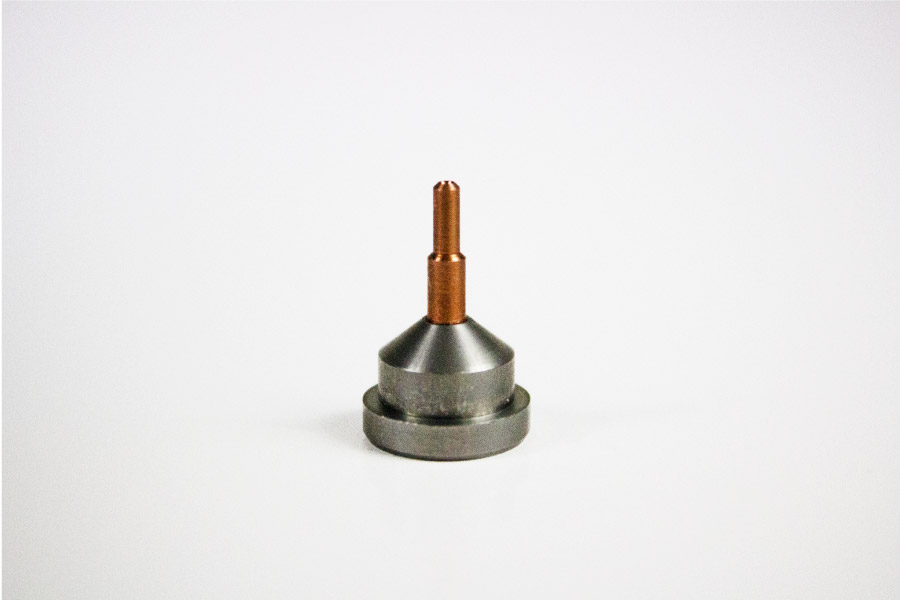
Technical Specifications for Goniometer Bases B1, B1A, B3, B3S, B4, and B5
| Bases | ||
| Materials | 416 magnetic stainless steel (B1, B1A, B5), copper (B3, B3S) and brass (B4) | |
| Base diameter at bottom | B1, B1A, B3, B3S, B5: inside: 9.70 mm; outside: 11.95 mm; B4: 3 mm | |
| Dimensions of tubing capture region | diameter: 1.93 mm, length: 5 mm (4 mm for B4). | |
| Central hole diameter | 0.81 mm | |
| Central hole bottom – height above goniometer head | B1,B3: 0.043″ (1.1 mm) | |
| Height of MicroMount aperture above goniometer head magnet | B1: 21 mm for 19 mm pins; B3: 21 mm for 19 mm pins; 19.7 mm for SPINE length pins (as specified in SPINE standard) | |
测角仪底座 B1、B1A、B3、B3S、B4 和 B5 的技术规格
| 基地 | ||
| 材料 | 416磁性不锈钢(B1、B1A、B5)、铜(B3、B3S)和黄铜(B4) | |
| 底部直径 | B1、B1A、B3、B3S、B5:内侧:9.70 毫米;外侧:11.95 毫米;B4:3毫米 | |
| 管道捕获区域尺寸 | 直径:1.93 毫米,长度:5 毫米(B4 为 4 毫米)。 | |
| 中心孔径 | 0.81毫米 | |
| 中心孔底部 – 测角器头上方的高度 | B1、B3:0.043 英寸(1.1 毫米) | |
| 测角仪头磁体上方 MicroMount 孔径的高度 | B1:19 毫米引脚为 21 毫米;B3:19 毫米引脚为 21 毫米;SPINE 长度引脚为 19.7 mm(如 SPINE 标准中指定) | |
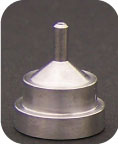
B1A(ALS 型)测角仪底座
用于固定水晶环的磁性底座/盖子。与 ALS 型机器人进样器完全兼容
- 独特的设计与MicroRT™ 毛细管兼容,可用于室温筛选和晶体脱水研究。
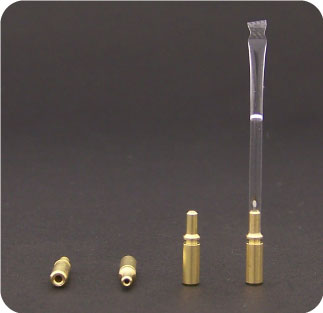
- 可与所有晶体安装座/环一起使用,包括MicroMounts™ 、MicroLoops™ 、MicroGrippers™ 和MicroMesh™ 。
- 款式有 MiTeGen 的专利可重复使用无胶设计或常规需胶设计
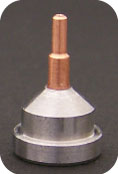
B5(SPINE 型)测角仪底座
- 与MicroRT™毛细管兼容, 用于室温筛选和晶体脱水研究。
- 可与所有晶体安装座/环一起使用,包括MicroMounts™ 、MicroLoops™ 、MicroGrippers™ 和MicroMesh™ 。
- 设计用于与 ALS 型机器人进样器配合使用。
(正在寻找 GBV SKU? CryoVials 现已单独出售)
B5(SPINE 型)测角仪底座
用于固定水晶环的磁性底座/盖子。与 SPINE 型机器人进样器完全兼容
- 独特的设计与MicroRT™ 毛细管兼容,可用于室温筛选和晶体脱水研究。
- 可与所有晶体安装座/环一起使用,包括MicroMounts™ 、MicroLoops™ 、MicroGrippers™ 和MicroMesh™ 。
- 款式有 MiTeGen 的专利可重复使用无胶设计或常规需胶设计
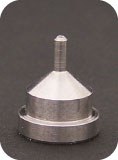
B3(SSRL/SAM 型)测角仪底座
- 与MicroRT™毛细管兼容, 用于室温筛选和晶体脱水研究。
- 可与所有晶体安装座/环一起使用,包括MicroMounts™ 、MicroLoops™ 、MicroGrippers™ 和MicroMesh™ 。
- 设计用于与 SSRL/SAM 型机器人进样器配合使用
(正在寻找 GBV SKU? CryoVials 现已单独出售)
B3(SSRL/SAM 型)测角仪底座
用于固定水晶环的磁性底座/盖子。与 SSRL/SAM 型机器人进样器完全兼容
- 独特的设计与MicroRT™ 毛细管兼容,可用于室温筛选和晶体脱水研究。
- 可与所有晶体安装座/环一起使用,包括MicroMounts™ 、MicroLoops™ 、MicroGrippers™ 和MicroMesh™ 。
- 款式有 MiTeGen 的专利可重复使用无胶设计或常规需胶设计
B3S(ALS 型)测角仪底座
- 与MicroRT™毛细管兼容, 用于室温筛选和晶体脱水研究。
- 可与所有晶体安装座/环一起使用,包括MicroMounts™ 、MicroLoops™ 、MicroGrippers™ 和MicroMesh™ 。
- 设计用于与 ALS 型机器人进样器配合使用。
(正在寻找 GBV SKU? CryoVials 现已单独出售)
B3S(ALS 型)测角仪底座
用于固定水晶环的磁性底座/盖子。与 ALS 型机器人进样器完全兼容
- 独特的设计与MicroRT™ 毛细管兼容,可用于室温筛选和晶体脱水研究。
- 可与所有晶体安装座/环一起使用,包括MicroMounts™ 、MicroLoops™ 、MicroGrippers™ 和MicroMesh™ 。
- 款式有 MiTeGen 的专利可重复使用无胶设计或常规需胶设计
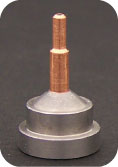
B4 测角仪底座
底座 B4 是我们的 IUCr 标准“黄铜针”型底座版本,常用于小分子晶体学,经过修改可与MicroMounts™和MicroRT™系统一起使用。与其他 3 毫米/1/8 英寸直径底座不同,我们的 B4 具有较小直径的中心孔,可紧密捕获 MicroMounts™ 的不锈钢棒,并具有延伸部分,可捕获 MicroRT™ 毛细管。用于室温和冷冻晶体学应用。
测角仪底座样式
- 采用最优质的材料精密加工而成,具有耐用性和可靠性。
- 与MicroRT™毛细管兼容, 用于室温筛选和晶体脱水研究。
- 可与所有晶体安装座/环一起使用,包括MicroMounts™ 、MicroLoops™ 、MicroGrippers™ 和MicroMesh™ 。
- 唯一接受 19 毫米和 SPINE 长度安装的铜柱底座。
- 与所有标准冷冻管兼容。